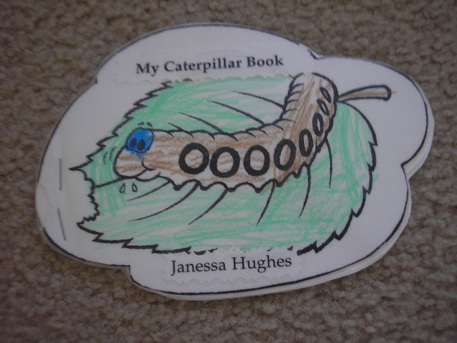
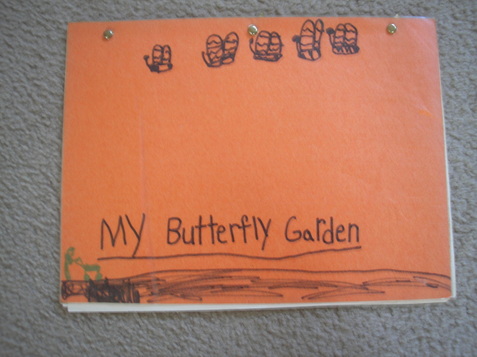
When my oldest daughter was little, her aunt gave her a butterfly garden. What a delight for her (and me) to watch the process of metamorphosis! Of course, even though she was five, I couldn't let the writing opportunity pass us by! I asked her to keep a record of her observations which then went into a book she illustrated. This assignment worked so well that I did it with my other daughters when they were old enough to make their own books. Who: preschool and elementary-aged children What: To connect writing with science, students watch the process of metamorphosis, keeping a record of their observations and making a simple book. Excerpts from Janessa's dictated text:
April 13
When we came home from church, my mom noticed that there were two cocoons on the lid, and me and my sisters were really excited because we knew they would be coming out soon.
April 15
Today there was a problem. One caterpillar on the bottom was very confused about where to make his cocoon. But there was another problem. It wasn't that he was on the bottom; it was that his cocoon didn't have the color it should. It was green.
April 22
Today one of my butterflies has a broken wing. My mom, my sisters, and I were all sorry for my little butterfly. I was about to cry when my mom noticed it because I didn't want my little tiny butterfly to be dead.
Today one of the cocoons dropped from the lid and went under the grass, so my mom, my sisters, and I couldn't see him. And he changed under the grass so we wouldn't see him so he would have privacy. The entries were good practice with non-fiction writing, but with interest in the butterflies high, I also asked them to write a fiction piece, a short story about a caterpillar-turned-butterfly.
Michaiah's story:
Once there was a caterpillar named Katie. One day she decided to make a cocoon and she took a hammer and nails and began hammering the nails around herself. Then she stayed there for sixteen days and on the seventeenth day she decided to try to get out of the cocoon. Then she nibbled and nibbled but she could not get out. So she hollered for help but no one came so she kept hollering for help but still no one heard her. Finally, she gave up and wiggled so much that the cocoon fell and broke a hole in it. Then she got out and was a beautiful butterfly. The End.
 A Related Idea
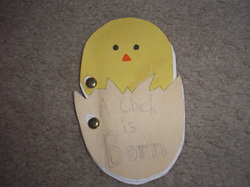
My husband said he knew we were homeschoolers when we incubated chicks in the dining room of our townhouse. That incredible process was also recounted in a small book, this time with transitional words (i.e. then, next, now) instead of dates.
A Related Story
We also watched tadpoles become frogs. Seemingly not keen on his home, one jumped out and landed behind the faucet of our kitchen sink, his transformation halted. (Uh, he died.) Not finding a single man in the neighborhood to remove him, I scraped and flipped him to the first place I could think of: the disposal. I dropped some other scraps down there and flicked the switch, trying hard not to think about what was happening. We didn't have any related writing projects! : )
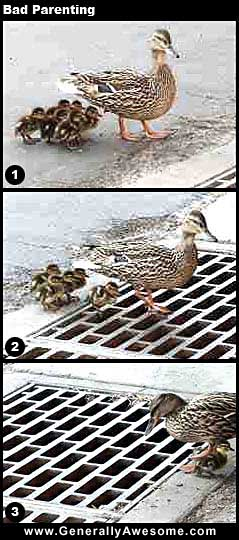
 Who: Students of any age What: Write a story based on a series of pictures. I love using these “Bad Parenting” pictures as a writing prompt. The stories students write are generally creative and fun. Prewriting: Invite your students to study the pictures, asking a list of W and H questions—who, what, when, where, why, how—and answering with as much detail as possible, orally or on paper. Note: The teacher need not be the one to think of and ask the questions. Allowing students to brainstorm their own questions is a valuable learning tool as well. Here are some of my questions. - What are the ducks’ names?
- How many ducklings are there in the first frame? The second? The last?
- If the ducks were personified, what would they be saying?
- Where are they coming from?
- Where are they going?
- What is happening outside the borders of each picture?
- What is the weather like?
- When Mama Duck looks in the grate, what does she see?
- What happened before the first picture?
- What happened after the last picture?
- What is Mama Duck thinking?
Once students have studied the pictures and answered their questions, they may be ready to write. Let them. Others may need additional props. If so, you may want to offer graphic organizers to help them see their story develop. Maybe a beginning/middle/end graphic organizer would be useful. This story map or this story map may also be just what they need. Drafting: Once students are ready, release them to capture these pictures in words as creatively and imaginatively as possible. Editing comes later, so they need not be hindered by conventions now. Revising: When the first draft is finished, commend your students but also remind them that there is more work to do. There are many ways to approach the revision part of the writing process and, with time, I hope to include many ideas on this site. For now, let's look at some of Ruth Culham's writing traits: ideas, organization, voice, sentence fluency, and word choice. Choose one (or as many as your students can handle) to address. You will find an excellent starting point with these revision sticky notes here. (Included is one for "Conventions," which you can use for editing.) Publishing: The process is complete; now it's time to celebrate the product. Add it to a collection of other pieces and make a coil bound book. Make a spiffy copy, including the pictures, and share it with Grandma. Send it to me to publish. I just added a Student Showcase to this site!
Who: For students in grades 5-8 What: Using two selections about the same situation--one simple and one more complex--students first notice the differences between them, then write simple and complex pieces of their own. How: Begin by inviting students to read the excerpts from each of the mentor texts below, writing their observations and discussing them. What are their impressions about each excerpt? Which one do they like better? Together, analyze the texts for sentence length, sentence openers, kinds of punctuation, ability to paint a picture in the reader’s mind, point of view, etc. Begin to use showing vs. telling terminology. If you can find the two books in a local library, check them out. Wait to show them until the discussion is complete, so they are not biased by the books themselves. I think they will be amused to see that the first selection comes from an easy reader. When students understand how the two texts differ, give them one of two tasks. Option #1: Rewrite the two selections, developing the simple one and simplifying the complex one. Option #2: Write two similar scenes, one that simply tells about the scene with short sentences and sparse details, the other that shows the scene with varied sentences and rich details. When students have completed their drafts, ask them to share highlights from their simple and complex pieces. Which one do they prefer? Which one was easier to write? Draw boxes around each sentence. How do the widths of the boxes compare from one piece to the other? Highlight the sentence openers. Is there variety? What is their strongest detail? Allow time to revise and edit the pieces before putting them away. (And consider sending me the pieces to add to my Student Showcase!) Selection #1 From I Am Rosa Parks by Rosa Parks with Jim Haskins “One day I was riding on a bus. I was sitting in one of the seats in the back section for black people. The bus started to get crowded. The front seats filled up with white people. One white man was standing up. The bus driver looked back at us black people sitting down. The driver said, ‘Let me have those seats.’ He wanted us to get up and give our seats to white people. But I was tired of doing that. I stayed in my seat. This bus driver said to me, ‘I’m going to have you arrested.’ ‘You may do that,’ I said. And I stayed in my seat. Two policemen came. One asked me, ‘Why didn’t you stand up?’ I asked him, ‘Why do you push us black people around?” Selection #2 From Rosa by Nikki Giovanni “Rosa settled her sewing bag and her purse near her knees, trying not to crowd Jimmy’s father. Men take up more space, she was thinking as she tried to squish her packages closer. The bus made several more stops, and the two seats opposite her were filled by blacks. She sat on her side of the aisle daydreaming about her good day and planning her special meal for her husband. ‘I said give me those seats!’ the bus driver bellowed. Mrs. Parks looked up in surprise. The two men on the opposite side of the aisle were rising to move into the crowded black section. Jimmy’s father muttered, more to himself than anyone else, ‘I don’t feel like trouble today. I’m gonna move.’ Mrs. Parks stood to let him out, looked at James Blake the bus driver, and then sat back down. ‘You better make it easy on yourself!” Blake yelled. ‘Why do you pick on us?’ Mrs. Parks asked with that quiet strength of hers. ‘I’m going to call the police!” Blake threatened. ‘Do what you must,’ Mrs. Parks quietly replied. She was not frightened. She was not going to give in to that which was wrong.”
Our kids know how to e-mail, chat, and text. Do they know how to write a personal letter? Last year, I gave my eighth graders regular opportunities to write letters by pairing them with senior citizens they had never met. Their assignment was to write monthly to their new friend, asking questions, answering questions, and developing a relationship. At the end of the year, when all those goals were accomplished, they used the research they gleaned from the letters and wrote a biography of their pen pal. They then adapted their paper into a speech, which they presented to the pen pals at their first face-to-face meeting.
Of all the assignments and projects they completed during the year, this was by far the most successful, establishing enduring relationships and giving students a real reason for writing and public speaking.
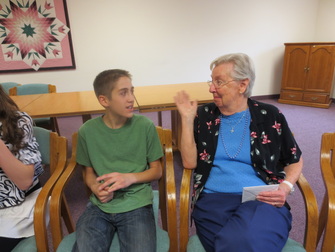 Micah and Arlene 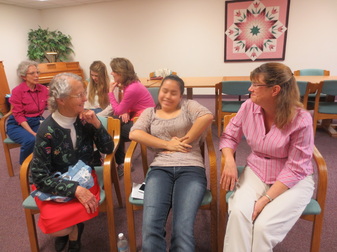 Rosie and Rosie (and Rosie's mom) 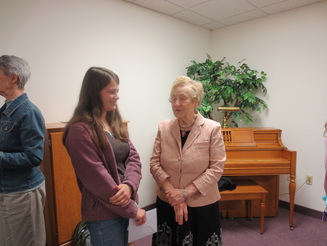 Leah and Dot 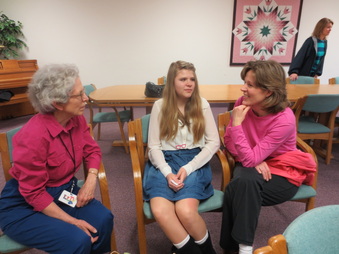 Ethel and Lianna (and Lianna's mom) 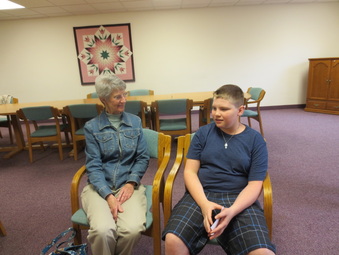 Sara and Jonas 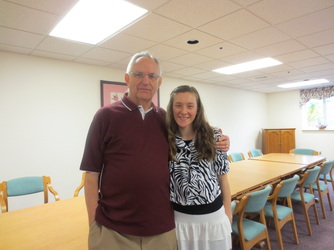 David and Alyssa--This was the only sad part of the project. Alyssa's pen pal was David's wife Joyce until she suddenly passed away.
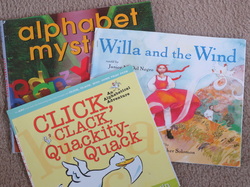 You know you're not supposed to judge a book by its cover, but these covers do not contain what you may suppose. You likely assume that the authors of these books are Doreen Cronin, Janice M. Del Negro, and Audrey Wood. If so, you are wrong. In fact, the authors are my daughters.
The local library had a crate of extra book jackets to give away, so I took a pile of them. The girls each chose their favorite one; then, using clues from the title and cover illustration, they wrote their own stories.
To make these books a little sturdier, we glued pieces of cardstock inside the front and back covers; we also printed their stories on cardstock. To hold it all together, we anchored the pages by stapling along the left side.
After they were finished, we found the original stories to read and compare.
This simple idea inspires creativity while giving kids a starting point, taking away the dread of filling a blank piece of paper, leaving them with real writing they will be eager to share.
 Not into fiction? Find a jacket for a non-fiction book. I tutored a boy who would rather trap and skin mice than read or write. He chose the Amazing Sharks! book cover, researched his favorite sharks, wrote a paragraph about each one, and drew simple illustrations to go with his text. It still wasn't as riveting as playing with mice, but at least he could accomplish his mom's goals while studying nature, his other passion.
I saw this idea when I was at a school, the finished stories hanging on the bulletin board in the hallway. So simple and creative! Who: Appropriate for any age but particularly for students who need a little structure for security What: The student uses each letter of the alphabet to tell a story. Let me show you; it will be easier. The following example is the beginning of my youngest daughter's retelling of "The Three Little Pigs and the Big Bad Wolf." She created this when she was five. A long time ago there lived three little pigs and their B eautiful mother named C atherine.The three little pigs were named D avid, Danny, and Doug. While they were E ating bacon and eggs and F ried potatoes, their mommy said, "You need to G o out in the world and build a H ouse for all of you." So the three little pigs set off. While they were walking, they saw a penguin with a wheelbarrow full of bricks. "Please, may we have some bricks to build a house with?" "Certainly," said the penguin. I t was hard work building the house, and they made a ping-pong table for all of them to play with. Sorry to leave you in suspense, but you get the idea. : ) What happened when she got to X? She used the word e Xcitedly to begin her sentence. Problem solved! Rebekah's story was eventually typed, illustrated, and preserved in a white hardbound book. Now it's on the shelf, a reminder of her personality and skills at age five and a benchmark of how far she has come!
Other Related Ideas: - One year I wrote our family Christmas letter with this format.
- With this structure, your student could retell a historical event or highlight a person she is studying .
Who: Any age, although the ideas I've included below would work best for preschool and elementary-aged children What: Have you seen white hardcover blank books? The possibilities for these books are endless, giving your child as many opportunities for writing (and drawing) as ideas you can imagine. Here are some ways we have used them in our home: 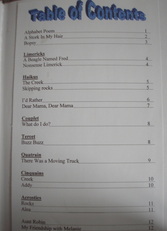 A Collection of Poetry
When my girls were in elementary school, I introduced them to the fundamentals of poetry. They learned about rhythm and rhyme scheme, stanzas and syllables. I showed them various forms of poetry, structures to help them write their own poems. They collected their poems and put them in a book.
 A Gift
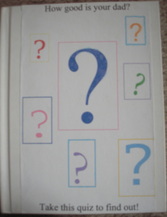
My daughters made a book to celebrate Father's Day. It includes a quiz, pictures, personal notes from each of them, and an envelope, empty now, which had money for two Yankees tickets.
 A Picture Book
My girls liked to write stories and draw pictures. For the extra special ones they wanted on the bookshelf, they used these blank books.
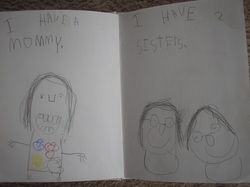 An I-Can-Do-It Book
Rebekah was four when I gave her a blank book. She wrote simple autobiographical text that she could then read to help her practice her reading skills. Each page is illustrated.
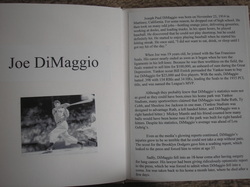 A Non-Fiction Book
My oldest daughter researched players from the New York Yankees, the old greats and the current favorites. Each player has his own chapter in the "then" section or the "now" section.
When these books are pulled off the shelf, they never fail to light the girls' faces and get them chattering about the good memories associated with them. They are definitely worth the extra effort it takes to make them.
How have you used blank books...or how do you plan to use them?
Who: For elementary- and middle school-aged children but especially suited to the "I don't know what to write about" crowd
What: The student writes the text for a wordless picture book. The text can be basic or elaborate, depending on the student's age and ability.
When and Where: I've used this assignment in a mini-class. I've also included it as a project in other classes. It works well with children at home as well.
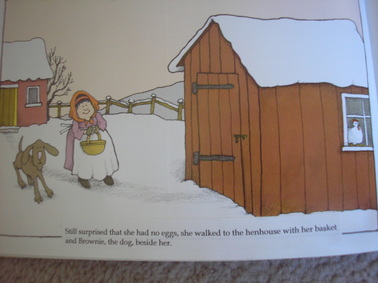
When I offered this class, using Tomie dePaola's book Pancakes for Breakfast, I sent out the following plea:
Help! Tomie dePaola, a popular children’s writer and illustrator, must have been at a loss for words when he made the book Pancakes for Breakfast. There is no text! I think he needs some writers, ages six to nine (or ten), to help him. Interested authors will meet at my house on [date] from [time] to [time] to receive instruction, guidance, and encouragement as well as a personal copy of the book to which they will add their original text.* The class will return on [date] to share completed books with one another and, of course, enjoy a pancake breakfast. The fee for this mini-class is [fee] which includes the cost of materials. Payment by [date] reserves a child’s spot in the class.
*Unless the child is able, a parent will need to type the text and help the child paste it into the book to make the book look “real.”
How: Below you will find instructions for the homeschooling mom with one or more children using dePaola's book.
Prewriting ~ Give your children a copy of the book. Invite them to page through it to become familiar with the story told through pictures. Encourage them to study the pictures carefully. What do they notice? (Note: you can do this together or individually.) Ask them to narrate the story aloud. Talk about the characters. What are their names? What are they like? Talk about setting: where and when does the story take place?
Drafting ~ You may give your children the following handout for writing their first draft. It's nothing fancy, but the short descriptions of each picture may help with organization, since the book doesn't have page numbers. (Some pages have more than one picture. I have described each picture on the handout. The student can write about each one or combine them instead.) The nice thing about using a handout is that it allows for revisions. We certainly don't want any overeager students writing anything in the books yet.
If handwriting hampers the process for younger children, take dictation. It's better to ignite the imagination and draw out creativity than it is to dampen both by making the child sit there and painstakingly move his pencil. Remember, it won't always be that way. (At least we hope not!) For older children who prefer to type their draft, let them; it will save a step.
 | pancakes_for_breakfast.pdf | | File Size: | 52 kb | | File Type: | pdf | Download File
Revising ~ When the drafting is complete, the student can conference with a parent or a sibling, looking for places to add details, dialogue, personality, anything that will enhance the story, taking it beyond, "She added flour. She added eggs...."
If you are working on a particular skill--i.e. using participles or strong verbs or parallel structure--encourage your child to find places to apply the skill.
When it's time to type, have the book nearby. Adjust margins to ensure the text won't cover any illustrations. Whether your child types the text himself or you do it for him, look at the story again. Is the child satisfied with it? Is there anything else to add or change?
Editing ~ What should you do about mistakes? If the child is young and you simply want a positive writing experience for her, leave them. Someday they will be cute. If the child is older, use this as a teaching opportunity, making grammar study practical. For example, if your student is allergic to periods, not including any or many, suggest that he read aloud his story, listening for the ends of sentences. If she needs to brush up on punctuating dialogue, this would be the perfect time to review and practice.
Preparing the book ~ When the text is ready and printed, use a paper cutter to cut each text block, marking the back of each one lightly with a pencil, so you know on which page to place it. Of course, you can also hand the child a pair of scissors if you don't mind unique cutting lines. When the text is ready, the student can carefully paste the papers to the book's pages with a glue stick.
Now it's time to personalize the book. Invite your child to page through a variety of books to see the features of published works. Perhaps he wants to include page numbers or a dedication or an "About the Author" blurb. Don't let him forget to include his name next to dePaola's on the cover and the title page.
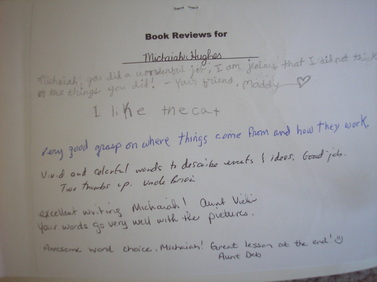
Inside the back cover, I like to include a half sheet of paper with a title, such as "Readers Say...." or "Book Reviews for __________." When your children share their books with Grandpa, Grandma, Aunt, Uncle, or Friend, ask each one to write comments about the book on this page, encouraging the author for a job well done.
Publishing ~ When the books are completed, celebrate with a pancake breakfast (or lunch). Place the books on the coffee table. Share them with friends and relatives. Store them on the bookshelf for the next read-aloud.
Other wordless picture books: Good Night, Gorilla by Peggy Rathmann Tuesday by David Wiesner And a host of other ones at Amazon.com If your children do this project, leave a comment with your favorite line(s) from their books. Here are some of mine: - "When she was in the barn, she milked her favorite cow Louise, singing, "Winter days are lovely. Winter days are lovely. Winter days are lovely. That's just fine."
- "At home, she let out an AAAAAAAHHHHHHHH. The eggs were scattered, the milk was spilled, the flour was dumped, and butter was on the floor."
- "Much to the surprise of the couple who lived there, Hattie came bounding up their front porch and bellowed, 'I smell pancakes!' Surprising the couple even more, Hattie drew up a chair, grabbed a fork and knife, heaped her plate with pancakes, plopped a glob of butter on them, and emptied the syrup pitcher onto them. She demanded, 'Let's eat!'"
|


 RSS Feed